Chat with us, powered by LiveChat

Call or Text 561.806.8026 for a free estimate today.

Residential Outdoor Lighting Planning Guide

Residential Outdoor Lighting Planning Guide

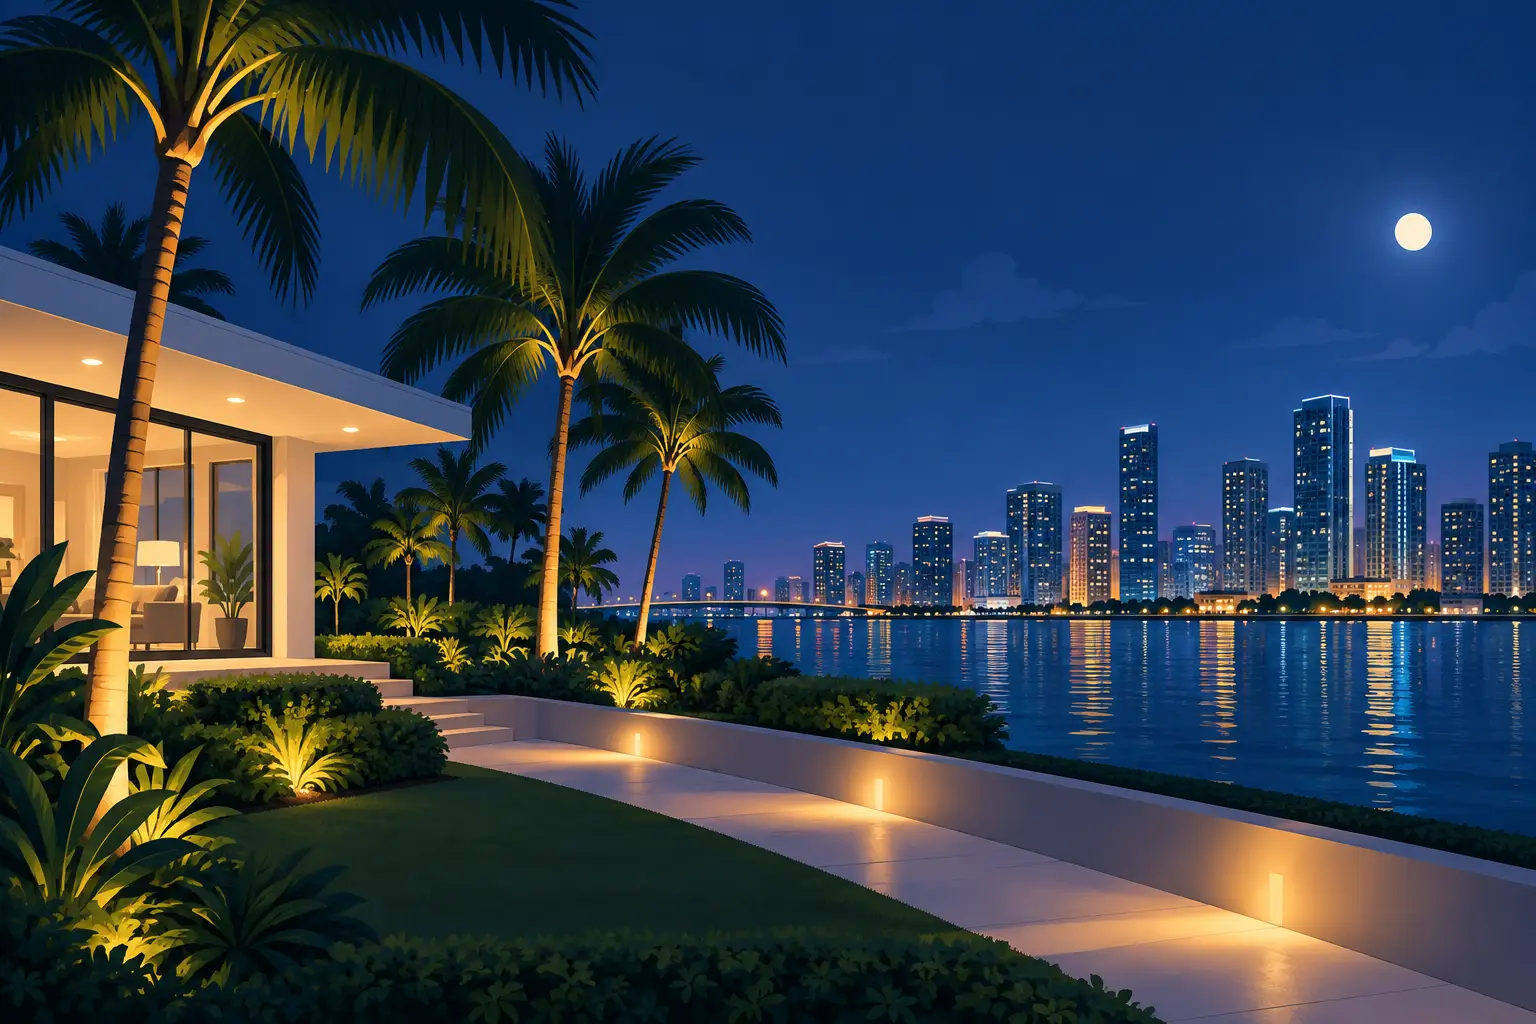
A beautiful South Florida property should not disappear when the sun goes down. The right residential outdoor lighting planning guide starts with how you want to live outside at night: arriving home, walking the garden, entertaining by the pool, or enjoying a quiet patio after a long day. Fixtures matter, but the real goal is a comfortable, cohesive nighttime setting that feels designed for your home.

For Palm Beach County homeowners, lighting also has to perform in heat, humidity, rain, salt air near the coast, and lush plant growth that changes from season to season. A thoughtful plan balances beauty with dependable visibility, energy efficiency, and a system that is practical to maintain.

Start With the View From the Street and the Door

Begin your planning at the curb. Pull into the driveway after dark and notice what is missing. Is the front door easy to identify? Does the home have depth and character, or does it read as one dark mass with a bright porch light? Are steps, changes in elevation, and the path from the driveway clearly visible?

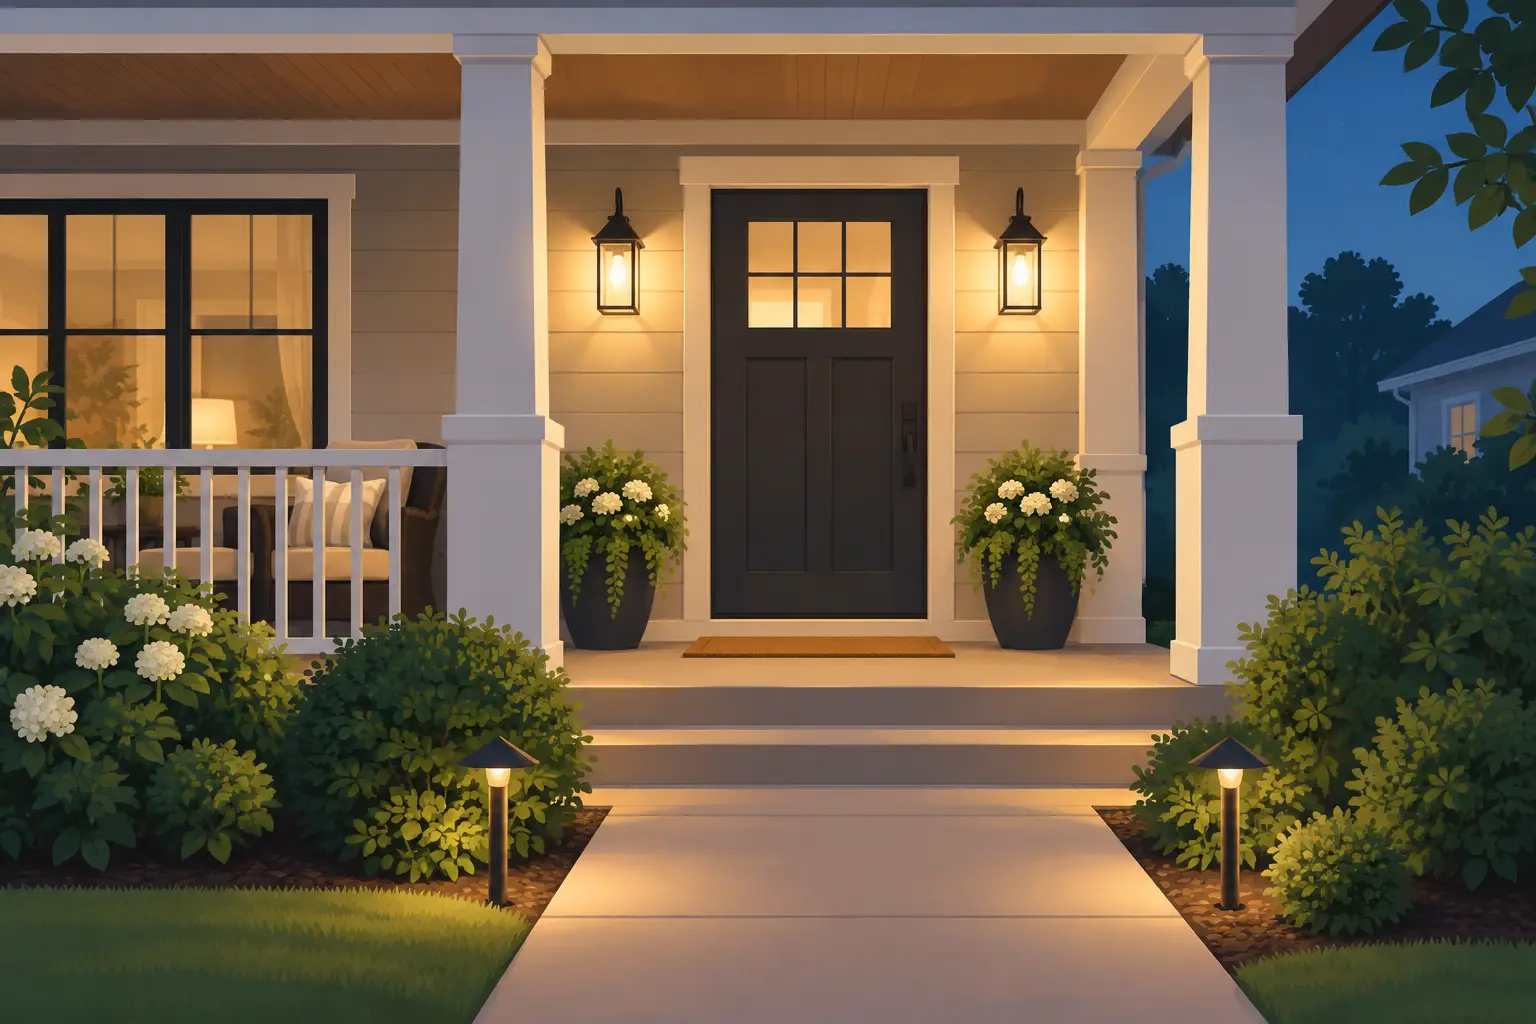
A well-lit entry should feel welcoming, not overexposed. Soft illumination along a walkway helps guide guests naturally toward the door. Carefully placed uplighting can reveal a textured façade, columns, palms, specimen trees, or a dramatic roofline. The goal is selective emphasis. Lighting every surface at the same brightness can flatten architecture and make even a refined property look harsh.

Think about sightlines from the street as well as from inside the home. A feature that looks striking from the driveway may create glare through a front window if the fixture is aimed poorly. Good design accounts for both perspectives before installation begins.

Plan the Property in Layers

The most successful outdoor lighting systems are layered. Each layer has a purpose, and together they create depth without making the landscape feel busy.

Ambient light establishes the overall mood

Ambient lighting provides a soft level of illumination across the property. It may come from subtle washes on planting beds, downlighting from trees, or carefully aimed light on walls and architectural elements. This is what keeps the yard from feeling empty beyond the edge of the patio.

In a tropical landscape, ambient light is especially valuable because it gives shape to palms, layered foliage, and garden beds after dark. It should remain gentle enough that the property still feels calm and residential.

Task light makes movement safer

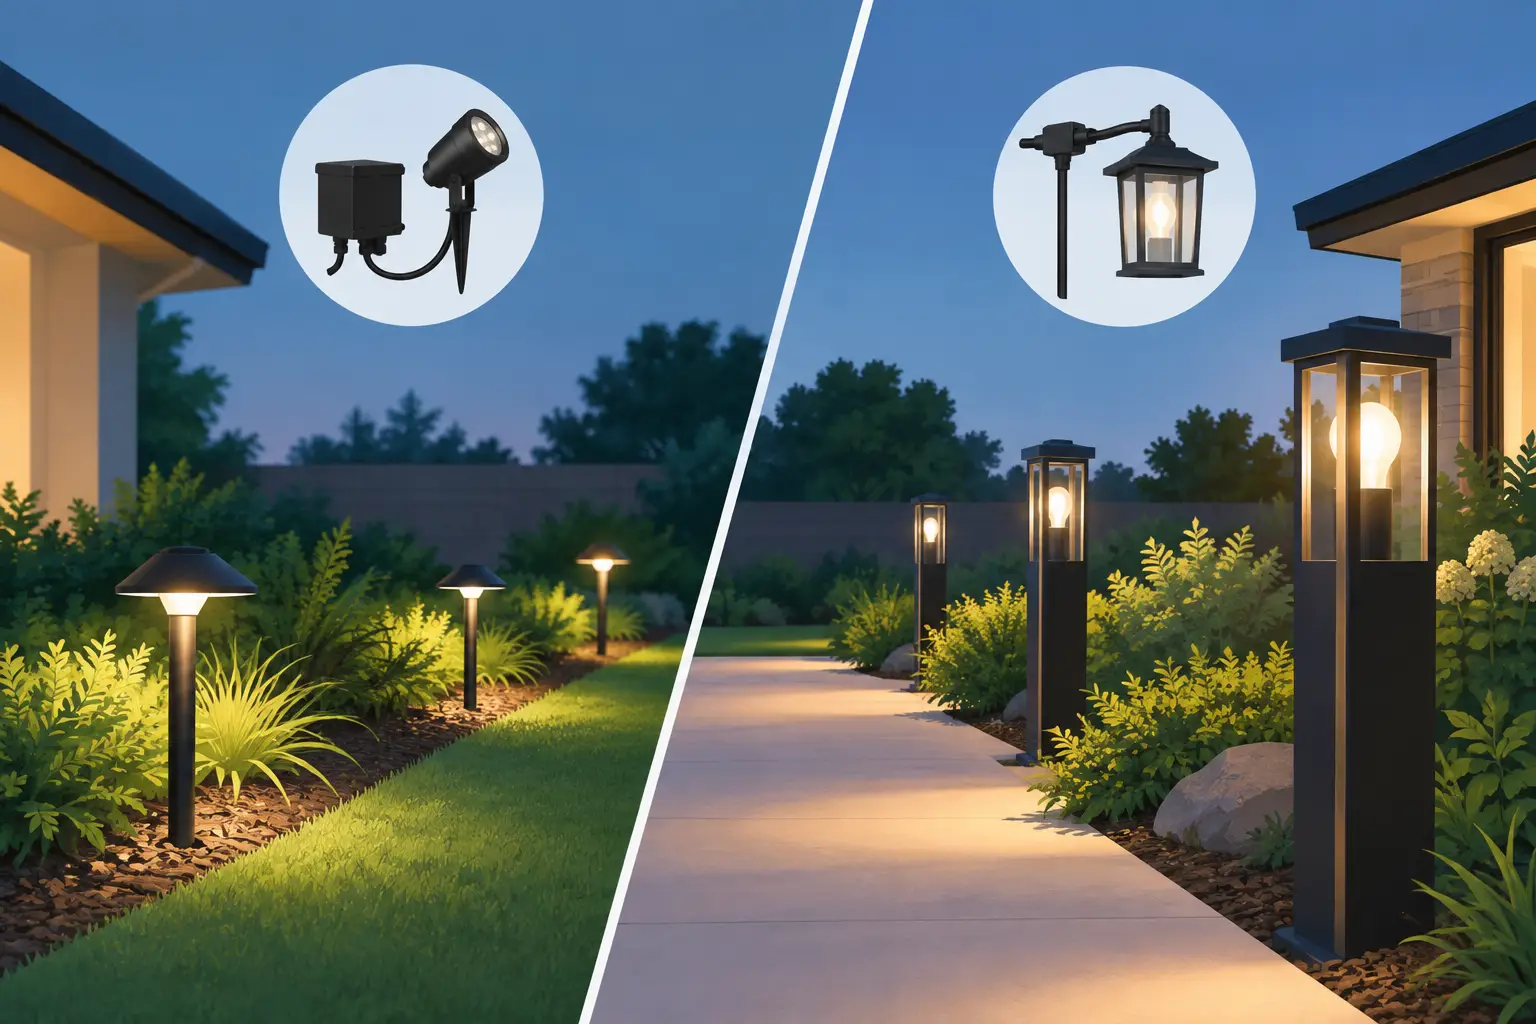
Task lighting supports the places where people walk, cook, gather, and enter. Path lights, step lights, deck lights, and lighting around an outdoor kitchen belong in this layer. These areas need enough illumination to prevent missteps and make evening use more comfortable, but they do not need to resemble a parking lot.

Spacing is often more important than fixture quantity. On a winding garden path, for example, light should define the route and reveal its edges rather than create a row of bright circles. Steps and transitions deserve special attention, particularly around pool decks, raised patios, docks, and side-yard gates.

Accent light creates the memorable moments

Accent lighting is where your individual style comes forward. It may highlight the trunk and canopy of a mature palm, the texture of coral stone, a fountain, a sculptural hedge, or an architectural niche. Use it to draw the eye to what makes the property distinct.

A common mistake is treating every tree or plant as a feature. Choose a few focal points that deserve attention. Contrast between lit and unlit areas is what gives a landscape dimension.

Design for How You Use the Backyard

Your backyard plan should begin with real routines, not a fixture catalog. A family that swims at night needs a different approach than homeowners who host dinner parties, spend evenings around a fire feature, or prefer a peaceful garden view from indoors.

Around a pool, focus on safe circulation and visual calm. Light paths, steps, gates, seating areas, and nearby planting beds without directing bright light across the water. Reflections can be beautiful, but glare can make the pool area less comfortable and reduce visibility. Warm, controlled landscape lighting often complements pool lighting better than a collection of bright floodlights.

For patios and outdoor kitchens, consider where people sit, prepare food, and move between the house and the yard. Downlighting from a pergola or mature tree can create a relaxed, natural effect. Under-cap or step lighting can make built features more usable while keeping the source of light discreet.

Also look back toward the house. Lighting the landscape beyond a patio extends the perceived size of the outdoor room and gives guests something pleasant to look at. A dark boundary at the edge of the hardscape can make an otherwise beautiful entertaining area feel closed in.

Choose Low-Voltage LED With the Environment in Mind

Low-voltage LED systems are a practical fit for most residential properties. They use less energy than older halogen systems, produce less heat, and provide long fixture life when quality components are properly installed. Flexible low-voltage wiring also makes it easier to bring lighting into planting beds, along paths, and around outdoor living spaces without major disruption to the landscape.

That said, LED quality varies. Color temperature, optical control, housing material, and driver quality all influence how a system looks and performs. For many homes, a warm white light creates the most inviting result, especially against stone, stucco, wood, and greenery. Cooler white light can look stark unless it is chosen for a specific architectural reason.

South Florida conditions also call for durable materials and careful installation methods. Fixtures should be selected for rain, irrigation exposure, humidity, and, where applicable, coastal air. Connections need to be protected, wiring must be routed thoughtfully, and transformers should be sized for the system rather than simply chosen as an afterthought.

Avoid Glare, Light Trespass, and the “Too Bright” Look

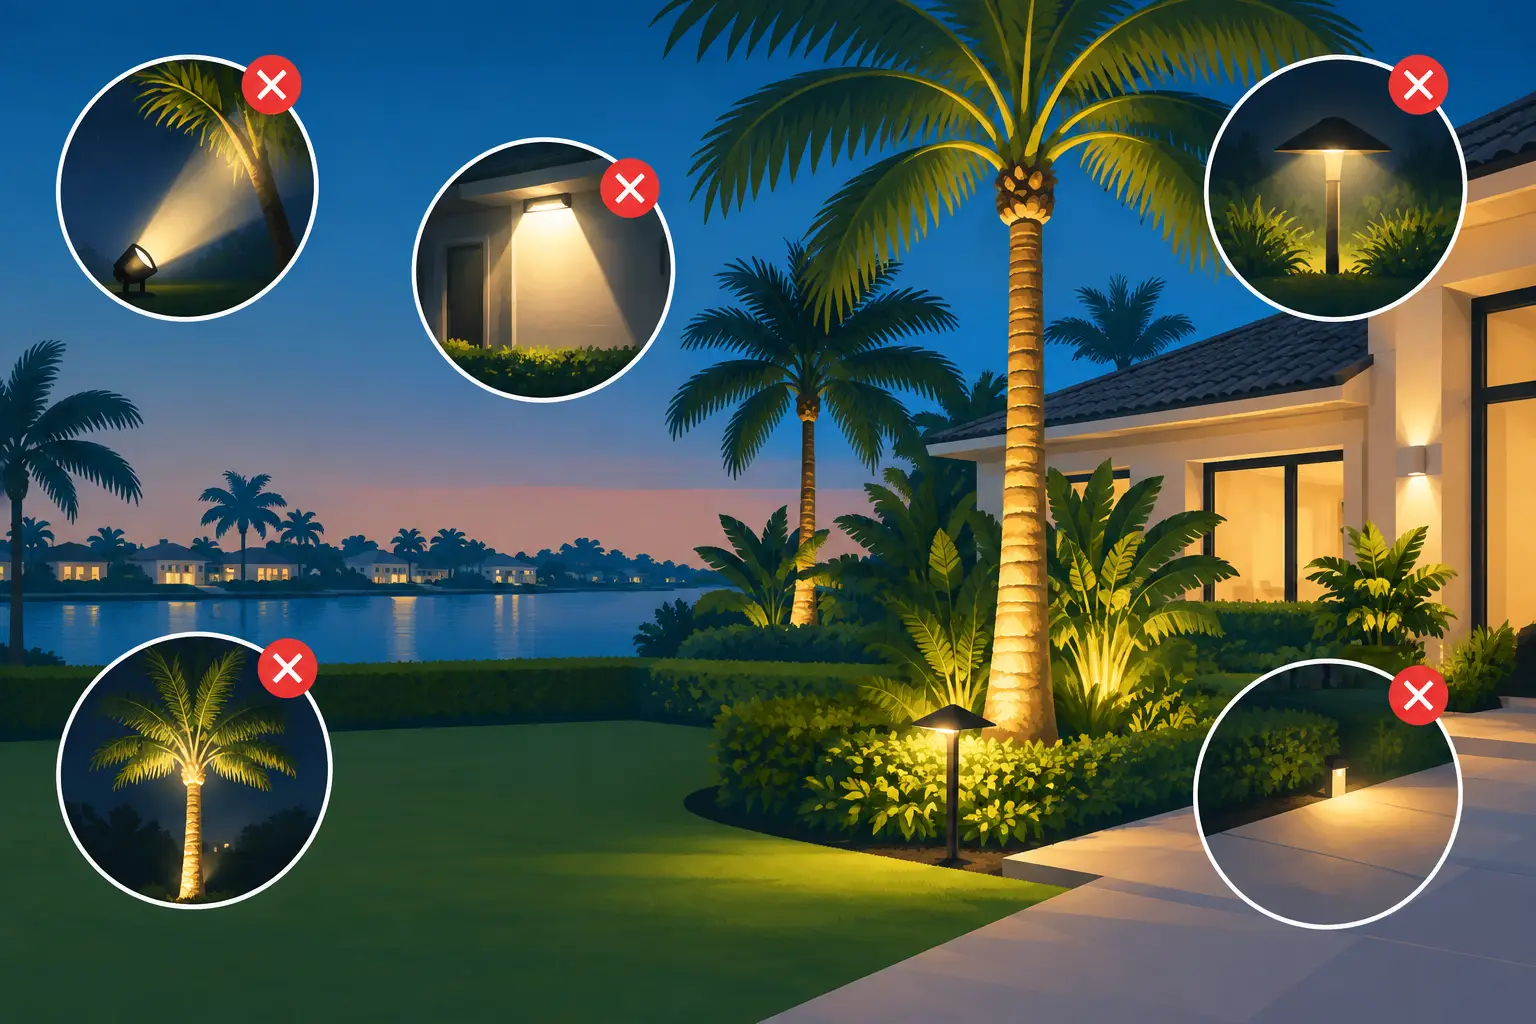
More light is not necessarily better light. Poorly aimed fixtures can shine into windows, distract drivers, bother neighbors, and make it harder for your eyes to adjust to the rest of the yard. A fixture that is hidden from view and aimed at a surface or plant often produces a far more polished result than one that exposes a bright bulb.

Use shielding, aiming, and beam spread to control where light lands. Wide beams work well for broad foliage, walls, and low planting beds. Narrower beams can define tall palms, columns, or focal-point trees. The right choice depends on distance, scale, texture, and viewing angle.

It also helps to plan for mature growth. A fixture that perfectly illuminates a young palm today may be blocked by foliage or swallowed by a growing hedge in two years. Allow access for adjustments and expect occasional aiming changes as your landscape evolves.

Build Controls Around Your Routine

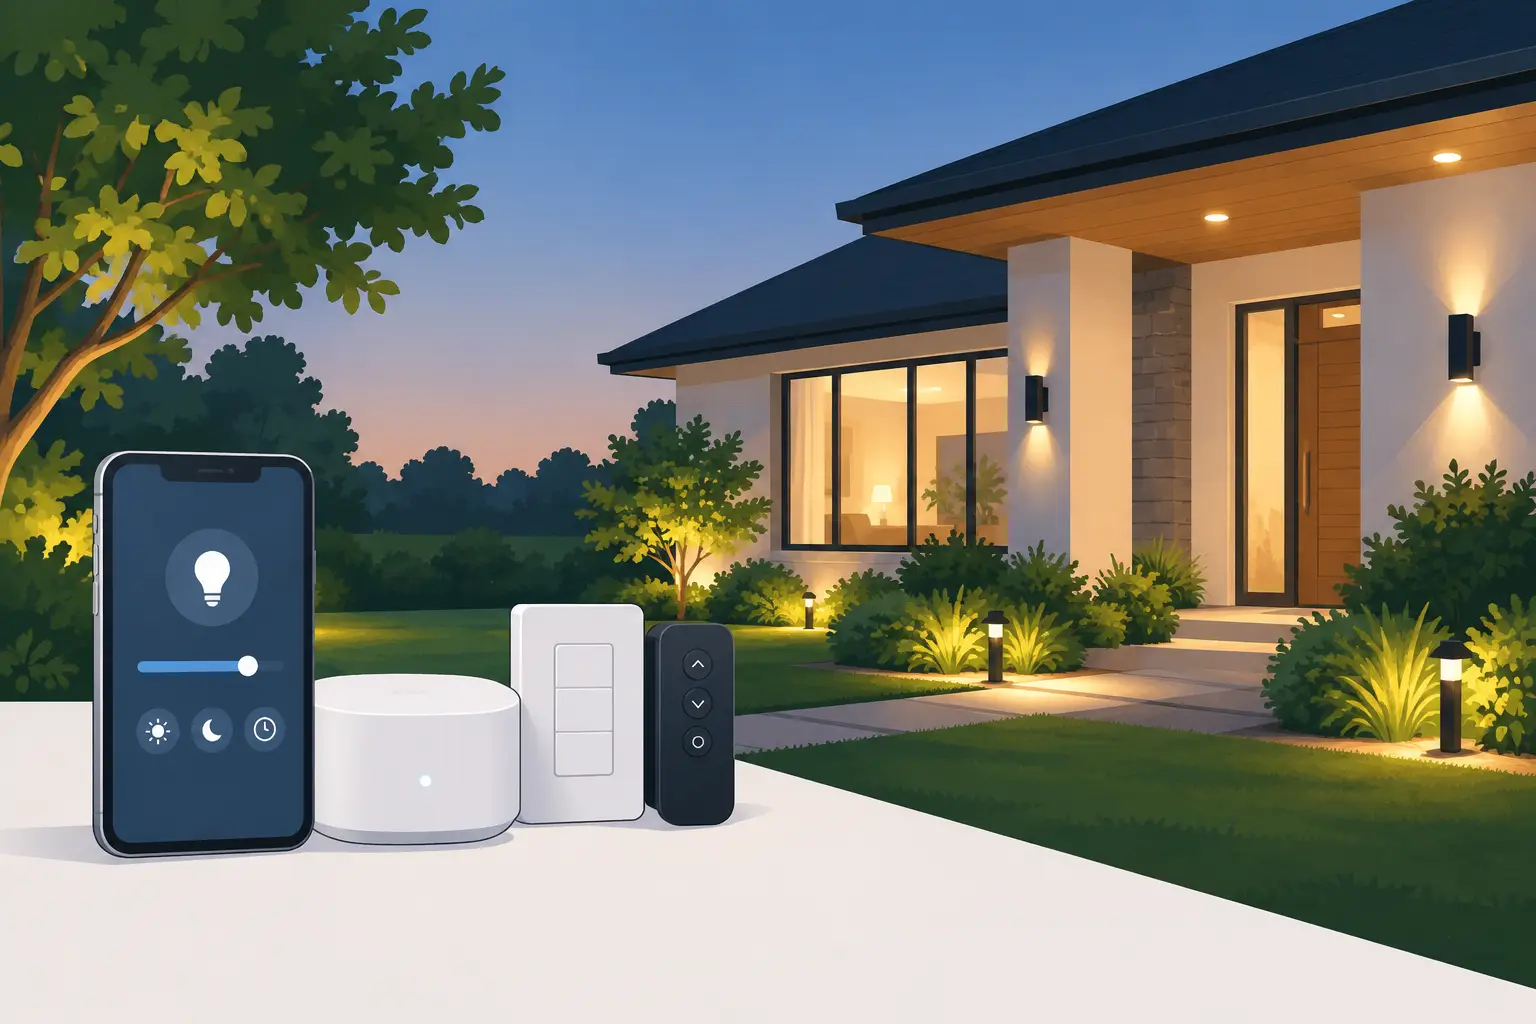
A lighting system should be easy to enjoy. Timers and photocells can turn lights on automatically at dusk and off at a set time. Smart controls may add scheduling flexibility, zone control, and the ability to adjust the system around travel, entertaining, or seasonal routines.

Zoning is worth discussing during the design phase. You may want the front entry and pathways operating nightly, while backyard accents, pool-area lighting, or a special entertaining zone can be controlled separately. This approach supports energy-conscious use without sacrificing the welcoming appearance of the property.

Budget for a Complete First Phase, Then Grow Thoughtfully

If the entire property is not in the budget at once, prioritize the areas with the greatest daily impact: the entry, main walkway, driveway transition, patio, and pool circulation. A well-designed first phase should look complete on its own, not like a few random fixtures waiting for the next project.

Ask that future zones be considered from the beginning. Proper transformer capacity, wire routing, and a clear design direction can make later expansion cleaner and more cost-effective. It is usually easier to add a garden focal point or side-yard path later when the core system was planned with growth in mind.

Work With a Designer Who Sees the Whole Property

A professional lighting consultation should involve more than choosing fixture styles. The designer should walk the property after considering architecture, existing landscaping, outdoor habits, safety needs, power access, and views from key windows. A nighttime demonstration, when available, can be particularly helpful because it lets you judge scale, brightness, and shadows before final placement.

At Tropical Landscape Lighting, the aim is to create a connected nighttime environment, not simply place lights around a yard. The right plan gives each area a job while keeping the finished property natural, refined, and easy to use.

Before choosing a single fixture, take one evening walk through your property and notice where you slow down, where you hesitate, and where you wish the view carried farther. Those observations are the beginning of a lighting plan that will feel right every night you come home.

Posted in Uncategorized

How to Choose Outdoor Lighting Zones at Home

How to Choose Outdoor Lighting Zones at Home

A beautiful South Florida property can disappear quickly after sunset if every fixture is asked to do the same job. The right way to choose outdoor lighting zones is to think about how you move through the property, where you gather, and which features deserve attention after dark. A well-planned system does more than brighten the yard. It makes arrivals safer, gives outdoor rooms a welcoming presence, and lets the architecture and landscaping feel connected at night.

For Palm Beach County homeowners, zoning also creates flexibility. You may want a softly lit front entry every evening, a brighter pool and patio setting when friends visit, and subtle garden lighting that adds depth without competing with the stars. Dividing the property into purposeful zones makes those moments easier to create while keeping the overall design refined.

Start With How You Use the Property at Night

Before selecting fixtures or choosing light levels, walk outside after dusk. Stand at the street, pull into the driveway, enter through the front door, and follow the same routes your family and guests use. Then look back toward the house from the patio, pool deck, or garden.

This simple exercise exposes the areas that need light for practical reasons and the areas that need it for atmosphere. A dark step may be a safety concern. A beautiful royal palm may be invisible from the patio. A patio can have plenty of ambient light but still feel uninviting because the dining table and seating area are not visually defined.

Think in layers rather than in individual fixtures. Most homes benefit from a combination of arrival and entry lighting, circulation lighting, living-area lighting, feature lighting, and perimeter or security lighting. These layers can overlap, but they should not all operate at the same intensity or on the same schedule.

Choose Outdoor Lighting Zones by Purpose

The most effective lighting plans assign a clear purpose to each zone. That does not mean every area needs its own switch or transformer run. It means the lighting designer knows what each part of the system is meant to accomplish and can group controls accordingly.

The Arrival and Front Entry Zone

Your front elevation is the first nighttime impression of the home. This zone usually includes the driveway approach, house numbers, front walk, entry steps, front door, and selected architectural or landscape focal points.

The goal is not to flood the entire façade with bright light. Instead, use controlled illumination to guide visitors naturally toward the entry and reveal the home’s character. Soft uplighting on columns, layered lighting in planting beds, and discreet path or step lights can create an elegant approach without glare shining into the street or neighboring windows.

This zone is often used daily, so it is a strong candidate for automatic dusk-to-dawn operation or a dependable evening schedule. If the home has a gate, long drive, or secondary entrance, those elements may belong in a related but separately controlled arrival zone.

The Pathways and Transition Zone

Walkways, side yards, stairs, and changes in elevation deserve their own attention because safety depends on consistent visibility. The best pathway lighting reveals where feet should go without creating a runway effect.

Fixtures should be spaced according to the width of the path, surrounding plants, and natural turns in the route. Too many lights can make the walkway feel harsh and cluttered. Too few can leave alternating bright and dark pockets that make depth harder to judge. Low-voltage LED fixtures allow for thoughtful placement and efficient operation, especially on longer routes around a property.

Transition areas matter too. The route from the driveway to the front door, from the kitchen to the patio, or from the pool deck to an outdoor restroom should feel intuitive after dark. These practical connections are easy to overlook during the day and immediately noticeable at night.

The Patio, Pool, and Outdoor Living Zone

In South Florida, outdoor living areas are not an occasional luxury. They are part of daily life for much of the year. A patio or pool zone should support conversation, dining, relaxation, and safe movement without turning the space into a brightly lit interior room.

Start by identifying activity areas: the dining table, lounge seating, outdoor kitchen, grill, pool steps, spa, and routes back to the house. Each may need a slightly different kind of illumination. For example, a dining space benefits from warm, comfortable ambient light, while an outdoor kitchen may need more focused task lighting. Pool coping, deck transitions, and steps need clear visibility, but fixtures should be positioned to minimize reflected glare across the water.

This is one zone where dimming and separate controls can make a major difference. A family dinner may call for a calm, low-level setting. A larger gathering may need more light near the grill, bar, and walking routes. The landscape beyond the patio should remain visible as a softly illuminated backdrop, helping the outdoor room feel larger and more finished.

The Landscape Feature Zone

Mature palms, specimen trees, hedges, flowering beds, textured walls, fountains, and garden art all create opportunities for a more dimensional nighttime landscape. This zone is about visual depth, not simply brightness.

Choose a few features with strong form, texture, or sentimental value. A well-placed uplight can reveal the canopy of a palm. Gentle grazing can bring out the texture of coral stone or stucco. Downlighting from a tree can add a natural moonlit effect across a lawn or seating area.

There is a trade-off here: highlighting every tree and planting bed reduces the impact of the best features. Darkness is part of good lighting design. Leaving some areas quiet gives the illuminated elements room to stand out and keeps the property from looking busy or overlit.

The Perimeter and Security Zone

Security lighting should help you see entrances, gates, side yards, and vulnerable areas without making the property feel commercial or exposing every corner to harsh glare. The most useful security lighting is targeted, shielded, and designed around real sightlines.

Consider where someone could approach unseen, where vehicles park, and which doors or side gates are used after dark. Motion activation can be appropriate for secondary areas, while a low, steady level of light may be better near frequently used gates or walkways. Bright fixtures pointed outward can create glare that actually makes it harder to see beyond the light source, so placement and shielding matter as much as output.

Decide What Should Operate Together

Once the zones are defined, the next question is control. Some homeowners prefer a simple automated system that brings on the front entry, paths, and selected landscape lights each evening. Others want separate scenes for entertaining, pool use, and late-night security.

A practical approach is to group zones by routine. The front entry and primary walkways may run nightly. Patio and pool lighting can have their own control for gatherings. Feature lighting may operate on a timer or be added to an entertaining scene. Security-focused areas may stay active later or respond to motion.

The right level of control depends on how often you use each area and how much flexibility you want. More zones create more options, but unnecessary complexity can make a system less convenient. An experienced lighting designer can build the flexibility into the low-voltage system while keeping day-to-day operation simple.

Balance Brightness, Color, and Fixture Placement

Lighting zones should feel related, even when they serve different functions. That comes from using compatible fixture finishes, warm and consistent color temperatures, and carefully managed light levels. A bright, cool-white path light next to warm, subtle garden lighting can make the landscape feel disconnected.

For most residential settings, warmer LED light creates a more comfortable and polished appearance around architecture, planting, and outdoor living areas. The exact color temperature and output should account for exterior finishes, foliage color, water features, and the amount of existing ambient light from the street or nearby properties.

Fixture placement deserves equal care. A light that looks correct from one viewpoint may create glare from another. Test sightlines from the front door, street, driveway, patio seating, and inside the home. Quality design considers what you see from every important perspective, not just where the fixture is installed.

Plan for Growth, Weather, and Maintenance

Landscapes change. Hedges fill in, palms grow taller, and new outdoor features are added over time. A zone that works perfectly after installation may need adjustment as plants mature or a patio is renovated. Flexible low-voltage wiring makes it easier to adapt a system than many homeowners expect, provided it was designed and installed with capacity in mind.

South Florida’s heat, rain, irrigation, salt air in coastal areas, and active landscaping also make product quality and installation practices especially important. Durable fixtures, secure connections, properly sized components, and accessible service points help protect the investment and reduce future maintenance concerns.

The best outdoor lighting zones do not call attention to the equipment. They make the property feel naturally more welcoming, useful, and secure after sunset. If you are unsure where to begin, start with the route you take home at night and the place you most want to enjoy after dark. Those two views usually reveal the first zones worth designing well.

Posted in Uncategorized

Landscape Lighting Cost Estimate Explained

Landscape Lighting Cost Estimate Explained

A Palm Beach home can look completely different after sunset. A softly illuminated entry, layered palms, a visible pool deck, and safe walkways make the property feel more welcoming and more usable. A reliable landscape lighting cost estimate starts with that complete nighttime experience, not simply with the number of fixtures placed around the yard.

For most South Florida homeowners, the final investment depends on the size of the property, the areas they want to enjoy after dark, and the quality of the system behind the light. Low-voltage LED lighting is flexible and energy-conscious, but a well-performing system still requires thoughtful design, professional installation, and components selected for our heat, humidity, rainfall, and coastal conditions.

What a Landscape Lighting Cost Estimate Should Include

An estimate should account for more than fixtures and labor. It should explain how the lighting system will work as a whole: where the power originates, how wiring will be routed, which focal points will be illuminated, and how the finished design will look from the street, patio, pool area, and inside the home.

A smaller, focused project that lights an entry path, front planting beds, and a few architectural details may begin around $1,500 to $3,000. A more developed lighting plan for a single-family home, including the front elevation, mature landscaping, walkways, and outdoor living areas, often falls in the $3,000 to $6,000 range. Comprehensive systems for larger properties, pool environments, long driveways, extensive trees, or multiple entertaining zones can range from $6,000 to $12,000 or more.

Those ranges are useful for early planning, but they are not a substitute for a site-specific proposal. Two homes with similar square footage can need very different lighting plans. One may have a simple front walk and open planting beds; another may have specimen palms, layered hedges, a waterfront view, a pool, and several patio areas that deserve distinct lighting treatments.

Design is the starting point

The design process is where a lighting system gains its character. Rather than treating every tree or planting bed the same way, a professional plan considers your home’s architecture, sightlines, textures, and the areas where your family spends time outdoors.

Uplighting can bring dimension to palms and mature canopy trees. Downlighting from a tree can create gentle, useful light across a pathway. Grazing light can reveal stone, stucco, or columns, while carefully shielded path lights guide guests without creating glare. Each technique requires different fixture types, placement, beam spreads, and mounting methods. That is why a fixture count alone rarely tells the whole cost story.

Fixture quality affects appearance and longevity

Premium fixtures cost more upfront than basic retail-grade options, but material quality matters in South Florida. Outdoor lighting must stand up to intense sun, irrigation, moisture, fertilizer exposure, and seasonal storms. Durable brass, copper, and high-quality composite fixtures generally provide better corrosion resistance and a more refined finish over time than lightweight alternatives.

LED performance matters as well. The color temperature, beam control, light output, and quality of the internal components all affect whether a home feels warm and inviting or harshly overlit. Good lighting should show the property at night without making it look like a parking lot.

A professional estimate should identify the proposed fixture types and explain their purpose. Homeowners deserve to know whether a fixture is intended to light a step, highlight an entry feature, wash a hedge, or accent a palm trunk.

The Installation Details That Change the Price

Low-voltage landscape lighting uses a transformer to reduce standard household current to a safer voltage for exterior lighting. The wiring is flexible, which allows the system to adapt to gardens, hardscape, and changing planting areas. Still, proper installation takes planning.

The crew must select an appropriate transformer capacity, calculate voltage drop across longer wire runs, make weather-resistant connections, and route cable carefully around irrigation lines, root zones, and hardscape. A system that is undersized or poorly connected may look acceptable at first, then develop uneven brightness, flickering, or premature failures.

Access also affects labor. A newly landscaped front yard with open beds is easier to work in than a heavily planted garden with dense roots, decorative rock, retaining walls, or existing hardscape. Installing lighting around a pool requires added care, especially when working near electrical equipment, drains, and finished surfaces. Homes with long drives or detached outdoor structures may require additional wire runs and larger power capacity.

If an estimate seems much lower than another proposal, ask what is being left out. The difference may involve fixture grade, transformer capacity, wire gauge, connection methods, installation depth, or the amount of design and nighttime adjustment included. Lower price is not always lower value, but a higher price should also be supported by a clear plan and quality components.

Plan Your Budget by Outdoor Priority

A phased approach can be a smart option when you want a complete result over time. Start with the areas that most affect daily safety and curb appeal, then expand the system as priorities and budget allow. Because low-voltage lighting can be extended when it is designed with future capacity in mind, the first phase should not limit the next one.

For many Palm Beach homeowners, the best first priorities are the front entry, driveway or walkways, key architectural features, and the immediate patio or pool area. These zones deliver a visible improvement while addressing common safety concerns. Mature palms, garden focal points, rear entertaining spaces, and broader property accents can follow in a later phase.

The goal is not to light every inch of the landscape. Selective illumination creates depth, preserves shadows, and gives the eye a reason to move across the property. A smaller, well-designed system often feels more elegant than a larger system with too many bright fixtures.

Long-Term Operating Costs and Maintenance

LED landscape lighting is known for low energy use and long lamp life. The electrical cost of operating a thoughtfully designed LED system is generally modest compared with older halogen systems, particularly when it is controlled by a timer, photocell, or smart control setup. Exact operating costs depend on the number of fixtures, wattage, schedule, and local utility rate.

Maintenance should still be part of the conversation. Landscapes grow, fixtures can shift, mulch can cover path lights, and irrigation heads may need adjustment. Periodic service helps maintain the intended effect and lets a technician inspect connections, clean lenses, correct fixture angles, and replace any damaged components before small issues become larger ones.

A quality installation also protects the investment in your landscape. Properly placed fixtures should complement plant material and hardscape without interfering with mowing, trimming, irrigation, or normal outdoor use. This is especially valuable in a landscape that changes throughout the year.

Questions to Ask Before Approving an Estimate

A clear proposal gives you confidence in both the design and the installer. Before moving forward, ask whether the plan identifies the fixture locations and lighting goals, what materials are being used, how the system will be powered and controlled, and whether adjustments are included after dark. It is also worth asking how the installation team handles existing irrigation, what warranty or repair support is available, and whether the system can be expanded later.

At Tropical Landscape Lighting, the most useful estimate begins with a conversation about how you want your home to feel at night. Some clients want a stronger front-of-home statement; others want safer access to a dock, patio, or pool. The right recommendation reflects both the property and the way it is lived in.

A thoughtful lighting investment should give you more than brighter landscaping. It should make arriving home feel better, help guests move comfortably through the property, and bring your favorite outdoor spaces back into the evening. A professional on-site estimate is the clearest way to turn those priorities into a lighting plan that fits your home and budget.

Posted in Uncategorized

Choosing the Right Outdoor Lighting Transformer Size

Choosing the Right Outdoor Lighting Transformer Size

A landscape lighting system can look beautifully designed on installation day and still disappoint after sunset if the transformer is undersized. The right outdoor lighting transformer size gives every fixture the power it needs, helps maintain consistent brightness across the property, and leaves room for the lighting plan to grow with your home.

For Palm Beach County homeowners, this matters because outdoor spaces often extend well beyond a front walk. A complete low-voltage LED system may include architectural lighting, palm and specimen tree uplighting, garden accents, pathway fixtures, pool-area illumination, patio lighting, and subtle lighting around entertaining spaces. Each fixture draws a small amount of power, but the total adds up quickly.

Why transformer sizing affects the finished look

The transformer is the heart of a low-voltage landscape lighting system. It converts household line voltage into the lower voltage used by landscape fixtures, commonly 12 volts. More than a power source, it determines how reliably the system performs from the closest fixture to the farthest corner of the property.

When a transformer is too small, lights can appear dim, flicker, shut off unexpectedly, or place unnecessary strain on the equipment. Even if the system turns on, an undersized unit may make a carefully planned design look uneven. The front entry may be bright while a distant tree, pathway, or poolside planting bed receives far less light than intended.

An oversized transformer is not automatically the answer, either. The best choice is one sized to the actual load, wiring layout, voltage-drop needs, and reasonable plans for future additions. This is where professional design makes a visible difference. A transformer should support the entire nighttime environment, not simply power a collection of fixtures.

How to calculate outdoor lighting transformer size

The starting point is simple: add the wattage of every fixture that will operate on the transformer. For example, a system with 20 LED fixtures drawing 5 watts each has a connected load of 100 watts.

But the transformer should not be selected at its absolute maximum capacity. A sound design generally keeps the connected lighting load at or below about 80 percent of the transformer rating. That operating cushion supports dependable performance and makes it easier to add a few fixtures later without replacing the transformer.

Here is the basic calculation:

Total fixture wattage ÷ 0.80 = minimum transformer capacity

If your fixtures total 100 watts, divide 100 by 0.80. The result is 125 watts, so a 150-watt transformer would usually be the practical next size. If the system is expected to expand, a 200-watt unit may be the better long-term fit.

The fixture wattage must be the actual power draw, not the incandescent-equivalent number printed on some LED packaging. A lamp described as “equivalent to 50 watts” may only use 6 or 7 watts of electricity. Using the real wattage keeps the calculation accurate.

A typical residential example

Consider a South Florida home with eight path lights at 4 watts each, six uplights at 7 watts each, four palm lights at 8 watts each, and six architectural fixtures at 5 watts each. The total is 136 watts.

Dividing 136 by 0.80 produces 170 watts. A 200-watt transformer would provide appropriate capacity for that system, while a 150-watt unit would be pushed too close to its limit. If the homeowner plans to add lighting around a new patio, outdoor kitchen, or expanded planting bed, a 300-watt transformer may be a more thoughtful investment.

Voltage drop matters as much as wattage

Wattage capacity is only part of the decision. Low-voltage wiring loses voltage over distance, a condition called voltage drop. The longer the wire run and the greater the load on that run, the more likely distant fixtures are to receive less than the intended voltage.

This can show up as lights that are noticeably dimmer at the end of a pathway or inconsistent illumination across a long hedge line. On a property with mature landscaping, a pool enclosure, or lighting that reaches deep into the backyard, wire layout deserves as much attention as the transformer rating.

A quality transformer may offer multiple voltage taps, such as 12, 13, 14, or 15 volts. These settings allow the installer to compensate for voltage drop on longer runs, helping fixtures receive the proper operating voltage without overdriving closer lights. Correct wire gauge, carefully planned cable runs, and balanced fixture loads all work together to create an even result.

This is why two properties with the same number of fixtures may not need the same transformer setup. A compact front-yard design has different electrical needs than a large waterfront property with lighting distributed across several outdoor zones.

Plan for the features you may add later

Landscape lighting often grows naturally over time. A homeowner may begin with entry lighting and pathway safety, then add uplighting for palms, a soft glow around the pool, or accent lighting for a newly finished outdoor living area.

Choosing a transformer with some available capacity can make these additions simpler and more cost-effective. It avoids designing a system that has no room to evolve. Still, more capacity should serve a purpose. Installing a very large transformer for a small, fixed lighting plan may not improve performance and can add unnecessary cost.

During a lighting consultation, it helps to mention any planned improvements, including a pool renovation, new landscaping, a pergola, driveway changes, or an outdoor kitchen. These details allow the transformer and wiring infrastructure to support the property you are creating, not just the one you have today.

One transformer or more than one?

Many residential systems operate very well on a single transformer. For larger properties or designs with separate areas, multiple transformers can be the cleaner solution. This can reduce long wire runs, simplify voltage management, and make it easier to control distinct zones such as the front landscape, backyard entertaining area, and pool surroundings.

Separate transformers may also make sense when a property has a mix of lighting needs. The architectural lighting at the front of the home may follow a different schedule than the garden and patio lights in the back. Thoughtful zoning gives homeowners greater control over how their property feels at different times of night.

The decision depends on the layout, fixture count, cable distances, control preferences, and electrical access. It should be based on a design plan rather than a one-size-fits-all wattage chart.

Avoid these common transformer sizing mistakes

The most common mistake is choosing a transformer by fixture count alone. Ten fixtures can draw 30 watts or 150 watts depending on their type and lamp output, so the count provides very little useful information without actual wattage.

Another mistake is filling a transformer to 100 percent capacity. A system may technically operate this way, but it leaves no room for future fixtures and provides less margin for dependable performance. It can also make troubleshooting more difficult when changes are made later.

Homeowners should also be cautious about mixing fixture types or replacing lamps without confirming compatibility. LED systems are efficient, but different fixtures have different electrical requirements. A lighting professional can verify that the transformer, controls, cable, and fixtures are working as one properly matched system.

Finally, do not overlook the installation environment. In South Florida, transformers and connections must be installed with attention to moisture, heat, irrigation exposure, and the long-term demands of an outdoor setting. Quality equipment and careful workmanship protect both the system’s appearance and its reliability.

A properly sized system feels effortless

The goal is not to choose the largest number on a transformer label. It is to create balanced, dependable light that makes your entry safer, your landscaping more dimensional, and your patio or pool area more inviting after dark.

At Tropical Landscape Lighting, we look at transformer capacity as part of the full design – fixture placement, wire runs, voltage balance, controls, and the way you want to enjoy your home at night. When those details are planned together, the lighting feels natural: welcoming at the front door, comfortable around the patio, and consistent throughout the property.

Before selecting equipment, take a moment to think about the spaces you use after sunset and the ones you would like to use more often. That vision is the best place to begin sizing a lighting system that will serve your home beautifully for years.

Posted in Uncategorized

Garden Lighting Design Ideas for South Florida

Garden Lighting Design Ideas for South Florida

A South Florida garden can look completely different after sunset. Palms become silhouettes, flowering shrubs disappear into shadow, and a beautifully finished patio may feel cut off from the rest of the property. The best garden lighting design ideas do more than brighten those areas. They give the landscape depth, make outdoor living more comfortable, and create a natural visual connection from the front entry to the pool, patio, and garden beyond.

The goal is not to light every plant or eliminate every shadow. A well-designed low-voltage LED system uses light with restraint. It guides people where they need to go, draws attention to the features worth seeing, and preserves the calm, polished feeling of a private outdoor space.

Start Garden Lighting Design Ideas With How You Live Outside

Before selecting fixtures, consider how your property is used after dark. A family that regularly hosts dinners on the patio needs a different plan than a homeowner focused on curb appeal and secure access to the front door. Likewise, a poolside garden may need gentle orientation lighting, while a long side-yard walkway needs dependable illumination for safe passage.

Walk through the property at night and notice what feels missing. You may find that the path from the driveway to the entry is difficult to follow, the seating area feels isolated, or mature trees that define the garden disappear once the sun goes down. These observations are more useful than starting with a fixture catalog.

A personalized plan also accounts for the view from inside the home. In South Florida, large windows and sliding glass doors often frame the landscape as much at night as during the day. Lighting a focal tree, a layered planting bed, or a textured wall can make that view feel intentional without turning the yard into a stage set.

Build the Design in Layers

Professional lighting plans usually combine several types of illumination rather than relying on one bright source. Each layer has a job, and together they make the property feel welcoming and easy to navigate.

Give Walkways and Steps a Clear, Gentle Guide

Path lighting is one of the most practical additions to a garden. Fixtures set along a walkway, garden edge, or transition between patio areas help guests see changes in elevation and stay on the intended route. The most effective path lights create overlapping pools of light, not a rigid runway of evenly spaced bright dots.

Spacing depends on the fixture output, the curve of the walk, and nearby plant material. On a narrow path bordered by low greenery, fewer fixtures may be enough. A broad paver walk with steps or a change in grade may need more attention. The aim is clear footing with minimal glare, especially when guests are walking from a brightly lit interior to the darker outdoors.

For stairs, recessed step lights or carefully aimed downlights can be preferable to larger fixtures at ground level. The light should reveal each tread without shining into someone’s eyes from below.

Make Trees and Palms Part of the Nighttime Architecture

Mature palms, specimen trees, and layered tropical plantings are among the strongest features of many Palm Beach County properties. Uplighting can bring out a palm’s trunk texture, canopy shape, or the branching pattern of a large shade tree. A soft, narrow beam can create vertical drama, while a wider beam may better suit a full canopy or a grouping of smaller trees.

Placement matters as much as brightness. Positioning a light too close to a trunk can create a harsh hot spot. Placing it farther back often gives the tree more dimension and allows the beam to travel through the canopy. With palms, a lower, carefully aimed fixture can make the fronds feel sculptural without putting a bright source directly in the line of sight from the patio.

Not every tree needs a light. Choose a few strong focal points and let the surrounding darkness provide contrast. This is especially valuable in gardens with dense foliage, where too many uplights can flatten the scene and make it feel visually busy.

Extend the Patio, Pool Deck, and Outdoor Kitchen

Outdoor entertaining spaces need usable light, but they should still feel relaxed. A bright floodlight may make grilling easier, yet it can also wash out the atmosphere of a dining area and create uncomfortable glare around a pool. Layered lighting gives these spaces more flexibility.

Soft downlighting from an overhead structure or nearby tree can provide general visibility for seating and dining. Small fixtures integrated into retaining walls, planters, or built-in steps can define the edges of the patio. Focused task lighting at the grill, bar, or outdoor kitchen keeps food preparation safe without overpowering the rest of the space.

Around pools, light should make the deck perimeter, steps, and transitions visible. Reflections on water are part of the effect, but fixtures should be aimed thoughtfully so swimmers and seated guests are not looking into exposed lamps. The right balance makes the pool feel like a feature of the landscape rather than a dark void after sunset.

Use Light to Reveal Texture and Architectural Detail

Garden lighting does not stop at planting beds. Stone walls, columns, fountains, pergolas, entry gates, and architectural facades can all contribute to a more cohesive nighttime setting. Grazing a textured wall with a fixture placed close to its surface emphasizes material and craftsmanship. Washing a broad wall from a greater distance creates a softer, more even effect.

At the front of the home, lighting an entry tree, a portion of the facade, and the approach to the door can improve curb appeal while making arrivals feel more secure. The trade-off is restraint: if every column, roofline, and shrub is illuminated, the home can lose its sense of depth. Select the details that express the property’s character and allow the rest to support them quietly.

Choose Warm LED Light and Durable Low-Voltage Equipment

Color temperature has a major impact on how a garden feels. For most residential landscapes, warm white LED light is more flattering to natural stone, stucco, wood, and foliage than a cool blue-white tone. It also creates a more inviting setting for outdoor dining and conversation.

Low-voltage LED systems are particularly well suited to residential gardens because they are energy efficient, adaptable, and designed for long-term use. Wiring can be routed with less disruption than line-voltage installations, which is useful when working around established landscaping, patios, and irrigation. LEDs also reduce the frequent bulb changes associated with older lighting systems.

Fixture quality is not an area to compromise in coastal South Florida. Heat, humidity, irrigation, salt air in coastal areas, and active plant growth can all affect exterior equipment. Durable materials, proper connections, correct wire sizing, and precise fixture placement help the system perform as intended over time. A lighting design is only as good as the installation behind it.

Plan for Growth, Maintenance, and Changing Seasons

A garden is not static. Hedges grow taller, palms are trimmed, branches fill in, and new planting beds change the way light travels across the property. A fixture that creates a beautiful effect today can become blocked by foliage six months later. Professional placement considers the plant’s mature size and leaves access for adjustments.

It is also wise to separate lighting zones when the property has distinct outdoor areas. The front landscape, side access, pool area, and entertaining space may not need to operate the same way every evening. Timers, photocells, and app-based controls can make the system easier to manage, but they should support the way you live rather than add unnecessary complexity.

Regular maintenance preserves both appearance and safety. Fixtures may need to be repositioned after landscaping work, lenses cleaned, and connections checked. In a tropical climate, ongoing support is part of protecting the investment in a carefully designed system.

Work From a Nighttime Plan, Not a Fixture Count

It is easy to underestimate how much placement, beam spread, and aiming affect the final result. Two homes can use the same number of fixtures and look entirely different at night. One may feel balanced and inviting; the other may have glare, dark gaps, and disconnected focal points.

That is why Tropical Landscape Lighting approaches each property as a complete nighttime environment. The design should respect the home’s architecture, the garden’s strongest features, and the way the family moves through the space after sunset. A free on-site estimate can help turn broad inspiration into a plan that accounts for your walkways, planting, patio, pool, and preferred mood.

Spend a few minutes outside after dark before making any decisions. The places your eye naturally goes, the areas where you slow down, and the spots that feel uncertain will point toward a lighting design that makes the garden feel like it was always meant to be enjoyed at night.

Posted in Uncategorized

Outdoor Lighting for Home Security That Feels Welcoming

Outdoor Lighting for Home Security That Feels Welcoming

A dark side yard, an unlit gate, or a pool deck that disappears after sunset can make an otherwise well-kept home feel exposed. Thoughtful outdoor lighting for home security changes that experience without turning your property into a harshly lit perimeter. The goal is simple: create clear visibility where it matters, make activity around the home easier to notice, and preserve the warm, polished character of your landscape.

For Palm Beach County homeowners, security lighting also needs to work with the way people actually live outdoors. Patios, pool areas, garden paths, and front entries are part of the home year-round. A well-designed system should help protect the property while making those spaces more comfortable to enjoy after dark.

Security Starts With Visibility, Not Glare

The strongest exterior security lighting does not rely on a single oversized floodlight. Bright glare can create deep shadows beyond the beam, making it harder to see what is happening at the edges of the property. It can also wash out architectural details, disturb neighbors, and make a beautiful home look overly commercial at night.

A better approach layers light across the property. Soft, even illumination along walkways and driveways helps residents and guests move safely. Focused lighting at doors, gates, side yards, and service areas reduces the number of places where someone can approach unseen. Carefully aimed accent lighting around trees, hedges, and architectural features adds depth while preventing the landscape from becoming a dark backdrop.

The result is not a home that looks aggressively lit. It is a home that looks occupied, cared for, and easy to navigate.

Where Outdoor Lighting for Home Security Makes the Biggest Difference

Every property has its own vulnerable areas. On one home, the priority may be a long driveway and detached garage. On another, it may be a side gate leading toward the pool equipment, or a rear patio bordered by mature landscaping. A lighting plan should begin with how people enter, move through, and use the property after sunset.

The front approach and entry

The front of the home sets the first impression, but it is also where clear visibility matters most. Path lights, low-level step lighting, and gentle illumination on the facade make the route from curb to front door easier to see. Lighting the address number, entry landing, and nearby planting beds can help visitors, delivery drivers, and emergency responders identify the home without adding harsh brightness.

The front entry should feel welcoming, not flat. A balanced combination of architectural lighting and pathway illumination gives the area presence while reducing shadows near the door.

Side yards, gates, and service areas

Side yards are often overlooked because they are not part of the primary outdoor entertaining space. Yet these narrow areas commonly contain gates, utility equipment, air-conditioning units, and less-visible access points. Even, controlled lighting can make these areas easier to check at a glance from inside the home or while walking the property.

Gates deserve particular attention. A low-voltage fixture positioned to illuminate the latch and surrounding ground can improve everyday convenience and make nighttime access more visible. The fixture should be placed and aimed carefully so it does not shine directly into a neighbor’s window.

Driveways, garages, and detached structures

Driveways create a natural route to the house, garage, or rear yard. Lighting here should define the path of travel without producing glare for drivers. Downlighting from trees or structures, discreet path fixtures, and well-placed wall lighting can provide useful coverage while keeping the look refined.

If a home has a detached garage, boat area, storage building, or equipment enclosure, these spaces should be considered part of the larger lighting plan. Leaving one structure in complete darkness can create an awkward visual gap and a practical blind spot.

Pools, patios, and backyard transitions

Backyards should not be treated as security zones alone. In South Florida, they are extensions of the home. The challenge is providing enough light to see access points, steps, changes in elevation, and yard boundaries while keeping the pool, patio, and landscaping comfortable for evening gatherings.

Subtle lighting at steps and seating edges improves safety. Downlighting through palms or mature trees can create broad, natural-looking coverage over a lawn or patio. Accent lighting on walls, specimen trees, and planting areas gives the eye a sense of depth, which makes the property feel more open and easier to read after dark.

Use Motion Sensors as a Layer, Not the Entire Plan

Motion-activated lights can be useful at a side gate, rear access point, or little-used service area. Their sudden activation may draw attention to activity and can save energy when a space does not need constant illumination. But motion lights work best when they support a complete lighting design rather than replace one.

A property lit only by motion sensors can feel dark and unpredictable. Pets, landscaping movement, passing vehicles, and wildlife may trigger the lights unnecessarily. Poorly positioned sensors can also miss the areas homeowners assume they cover.

Consider combining motion activation with lower-level landscape lighting. The landscape system maintains safe, welcoming visibility, while sensor-controlled fixtures add extra brightness in targeted locations when movement is detected. Timers and smart controls can also adjust lighting schedules for travel, seasonal routines, or late-night use.

Why Low-Voltage LED Is a Smart Choice

For most residential landscape lighting projects, low-voltage LED systems offer a strong balance of performance, flexibility, and energy efficiency. They use less electricity than older lighting technologies and produce far less heat, making them well suited to gardens, pathways, architectural features, and outdoor living areas.

LED fixtures also give designers more control over beam spread, brightness, and color temperature. That matters because security is not just about adding more fixtures. It is about putting the right amount of light in the right place. Warm white light often complements South Florida homes and landscaping beautifully, while properly selected output keeps entry points and pathways visible.

Quality installation is especially important in Florida’s heat, rain, irrigation, and coastal conditions. Fixtures, connections, wire runs, transformers, and drainage considerations all affect how reliably a system performs over time. A professionally designed low-voltage system can be expanded or adjusted as the landscape matures, the property changes, or new outdoor spaces are added.

Design Against Hiding Places Without Overlighting the Yard

Dense planting is one of the features that makes a South Florida property feel private and lush. It can also create dark pockets near fences, windows, and walkways. The answer is not to illuminate every hedge from every angle. Excessive light can flatten the landscape and create glare that makes the property less pleasant to use.

Instead, use selective lighting to define edges and reveal depth. A gentle wash on a wall, uplighting on a canopy tree, or downlighting onto a side path can make a dark area more readable without exposing the entire yard to bright light. This approach supports security while preserving the visual drama that makes landscape lighting worthwhile.

It also pays to consider what can be seen from inside the home. Lighting a key tree, gate area, or walkway may allow a homeowner to check an exterior zone through a window rather than stepping outside. That everyday confidence is one of the most practical benefits of a well-planned system.

Installation Details Affect Long-Term Security Performance

A fixture that is too bright, poorly aimed, or placed in the wrong location can work against the system. Glare may obscure faces on a security camera. Light aimed directly at a window can interrupt sleep. Fixtures installed too close to fast-growing plants may lose their intended effect within a season.

A professional design accounts for sightlines, beam angles, mature plant growth, irrigation, drainage, and the way the property is used. It also considers maintenance. Quality LED systems require less frequent lamp replacement, but fixtures should still be checked periodically for shifting soil, plant growth, debris, and changes to settings or timers.

At Tropical Landscape Lighting, that planning begins with the home itself: its architecture, outdoor living areas, landscape character, and the places where a homeowner wants more confidence after dark. Security should feel integrated into the property, not added as an afterthought.

A Better Nighttime Experience for the Whole Property

The most effective security lighting does more than discourage unwanted activity. It helps guests find the front door, keeps family members steady on steps, makes a late swim or patio dinner more inviting, and brings structure to the landscape after sunset.

Start by walking your property after dark and noticing where your eye loses the path, where doors and gates disappear, and where landscaping creates uncertainty. Those observations are the beginning of a lighting plan that can make your home feel safer, more beautiful, and more comfortably yours every evening.

Posted in Uncategorized

LED Landscape Lighting Energy Savings at Home

LED Landscape Lighting Energy Savings at Home

A beautifully lit pool deck, palm-lined driveway, or garden walk should not come with a surprising electric bill. LED landscape lighting energy savings are one of the strongest reasons Palm Beach County homeowners choose a professionally designed low-voltage system. The right plan gives your property warmth, depth, safety, and curb appeal after dark while using a fraction of the electricity required by older outdoor lighting.

That result is not simply about replacing one bulb with another. Fixture placement, beam spread, transformer sizing, controls, and the way your landscape grows all affect how much light you need and how efficiently the system performs. A thoughtful design makes the most of every watt.

How Much Energy Can LED Landscape Lighting Save?

Traditional halogen landscape fixtures commonly use 20 to 50 watts each. A comparable LED fixture may use roughly 3 to 10 watts while producing useful, focused light for pathways, planting beds, architectural columns, and specimen trees. Exact savings depend on the fixture type and operating schedule, but the difference becomes meaningful quickly on a complete property.

Consider a home with 20 older 35-watt halogen fixtures. Together, they draw 700 watts when the system is running. Replacing them with 6-watt LED fixtures drops the load to 120 watts. If the lights run six hours a night, that is a reduction of about 3.5 kilowatt-hours per evening.

Over a year, the lower electrical draw can add up to well over 1,000 kilowatt-hours saved. Your actual utility savings will depend on your electric rate, the number of fixtures, and how long the lights operate. Still, LED efficiency is especially valuable in South Florida, where outdoor spaces are used throughout the year rather than only during a short summer season.

Lower wattage also gives a low-voltage system more flexibility. A properly sized transformer can support more carefully placed fixtures without unnecessarily increasing the electrical load. That makes it easier to light a long walkway, pool perimeter, entry garden, or backyard entertaining area with balance instead of bright, wasteful hot spots.

Energy Savings Should Never Mean a Dim Property

One concern homeowners sometimes have is that efficient lighting will look weak or overly cool. That may have been true of some early LED products. Quality landscape LEDs now offer warm color temperatures, strong color rendering, and optical control that can create a rich, natural nighttime appearance.

The goal is not to flood the yard with light. It is to guide the eye. Soft path lighting can define where guests walk. Gentle uplighting can bring out the trunk and canopy of a mature palm. A controlled wash of light can reveal textured stone, architectural details, or a garden wall without shining into windows or toward neighboring homes.

This approach often uses less energy than a bright fixture mounted in the wrong place. When light is directed only where it adds beauty, visibility, or security, fewer watts are wasted. The property feels more refined because the lighting has purpose.

Better Optics Make Every Watt Work Harder

Fixture wattage is only one part of efficiency. The lens, reflector, beam angle, and shielding determine where the light goes. A narrow beam may be ideal for a tall palm or façade detail, while a wider beam can softly illuminate a broad hedge or layered planting bed.

Using the wrong beam spread can lead to over-lighting. A contractor may compensate for poor coverage by installing a brighter lamp, even though a lower-wattage fixture with the correct optic would create a better result. Professional design accounts for scale, viewing angles, foliage density, and the light levels already present around the home.

Where LEDs Reduce Costs Beyond the Electric Bill

Energy use is only part of the ownership cost. LED fixtures have a much longer service life than halogen lamps, which can burn out more frequently and require repeated replacement. For properties with fixtures tucked into dense landscaping, mounted high in trees, or positioned around water features, fewer lamp changes are a practical advantage.

Less maintenance also helps preserve the consistency of the design. With older systems, one failed lamp can leave a dark spot along a walkway or make one side of the home look unfinished. Long-lasting LEDs help keep the intended nighttime effect intact with less interruption.

Heat is another consideration. Halogen lamps run hot, while LEDs produce far less heat at the fixture. In South Florida landscapes, where mulch, dry debris, and plant material may sit near fixtures, cooler operation is a welcome benefit. It does not replace proper installation practices, but it supports a safer, more efficient system.

LED technology can also reduce strain on transformers and wiring when a system is planned correctly. That matters when expanding lighting over time. A homeowner may begin with an entry, driveway, and front landscape, then later add pool-area lighting, patio accents, or backyard tree lighting. Low-wattage LEDs make those additions more manageable, though capacity should always be evaluated before new fixtures are installed.

Controls Protect Your LED Landscape Lighting Energy Savings

Even the most efficient fixture uses more power than necessary if it runs all day or stays on long after everyone has gone inside. Controls are where energy-conscious lighting becomes easy to live with.

A timer can establish a dependable schedule, turning lights on near dusk and off at a preferred time. Photocells respond to changing daylight conditions, which is helpful during South Florida’s seasonal shifts and afternoon storms. Smart controls can provide more scheduling flexibility, including different settings for weeknights, weekends, vacations, and entertaining.

A practical approach may be to keep entry, walkway, and key security lighting on longer while reducing decorative accent lighting later in the evening. For example, the front approach and side gate can remain illuminated for safe arrival, while pool-area uplights and garden accents turn off after the household settles in for the night.

The best schedule depends on how you use your home. A family that hosts outdoor dinners frequently may want the patio and pool lighting active later than a homeowner focused primarily on front-entry security. Controls should support your routine rather than force you to compromise the enjoyment of the property.

Why Design Matters More Than Fixture Count

It is tempting to judge a lighting proposal by the number of fixtures included. More fixtures do not automatically mean better coverage, more beauty, or greater security. In fact, too many poorly selected fixtures can create glare, flatten architectural details, and increase energy use without improving the experience outdoors.

A cohesive design starts with the places that matter most: the arrival sequence, pathways, steps, changes in elevation, outdoor living areas, specimen plants, and architectural focal points. From there, lighting is layered so the property has comfortable visual rhythm rather than isolated pools of brightness.

In a mature South Florida landscape, this planning is especially important. Palms, bougainvillea, hedges, and tropical planting beds grow and change. A fixture that looks perfect when installed can become blocked by foliage later. Professional placement anticipates maintenance access, plant growth, drainage, and the need to keep fixtures discreet in daylight.

Tropical Landscape Lighting approaches each project as a complete nighttime environment, not a collection of products. That includes selecting low-voltage LED fixtures that complement the home’s architecture and landscape while keeping long-term operating costs in view.

When LED Upgrades Need More Than New Fixtures

An older landscape lighting system may be a good candidate for an LED retrofit, but it should be evaluated before fixtures are simply swapped out. Existing wiring, connections, transformer capacity, voltage drop, and fixture condition can all affect performance.

A retrofit can be cost-effective when the wiring is in good condition and the overall layout still serves the property. It may make more sense to redesign portions of the system when fixtures are corroded, lighting is uneven, landscaping has changed significantly, or the current layout does not meet your safety and lifestyle needs.

Professional installation matters here. Low voltage does not mean low planning. Correct connections, stable mounting, weather-resistant components, and proper voltage at each fixture protect both appearance and fixture life. A system that is installed carefully from the start is more likely to deliver the energy savings and dependable nighttime performance homeowners expect.

A well-lit home should feel inviting from the street, comfortable around the patio, and easy to move through after sunset. With efficient LEDs and a design tailored to the way you live outdoors, you can enjoy those evenings more often without giving unnecessary energy a place in your monthly bill.

Posted in Uncategorized

Low Voltage Lighting Maintenance Tips for Florida

Low Voltage Lighting Maintenance Tips for Florida

A South Florida landscape lighting system has a demanding job. It faces summer downpours, irrigation overspray, salt air near the coast, fast-growing plant material, and outdoor entertaining that often continues well after sunset. These low voltage lighting maintenance tips help preserve the warm, polished nighttime setting you invested in while keeping pathways, pool decks, gardens, and entry areas safely illuminated.

Low-voltage LED lighting is designed for long service life, but it is not maintenance-free. A little seasonal attention can prevent a dim fixture, hidden wire, blocked beam, or poorly aimed light from changing the look and function of your entire property.

Start With a Nighttime Walk-Through

The best way to evaluate landscape lighting is after dark. Every few months, walk your property slowly with the system on. Start at the street, then move through the front entry, walkways, patio, pool area, garden beds, and backyard gathering spaces. Look at the overall impression before focusing on individual fixtures.

Ask whether the home still feels balanced. Are the architectural features you wanted to highlight still visible? Are steps, grade changes, and path edges easy to see without glare? Has one bright fixture started to pull attention away from the rest of the design?

Then look for practical changes: lights that are out, noticeably dimmer than nearby fixtures, flickering, shining into windows, or blocked by leaves. A fixture can be working electrically and still fail to do its job because landscaping has grown in front of it or it has shifted after heavy rain or routine yard work.

Keep Fixtures Clean Without Damaging Their Finish

Landscape fixtures collect mulch, soil, pollen, hard-water deposits, and debris. In Palm Beach County, regular rain does not always solve the problem. It can leave mineral spotting on lenses or wash soil over ground-mounted fixtures.

With the system turned off, gently brush away debris from the top of each fixture and around the lens. Use a soft cloth dampened with mild soap and water for exterior surfaces and lenses. Avoid abrasive pads, strong solvents, pressure washers, and harsh chemicals. They can scratch the lens, damage protective finishes, or force water into places it does not belong.

Pay extra attention to well lights and in-ground fixtures. These are especially prone to collecting mulch, standing water, and soil. Clear drainage around them so water can move away from the fixture rather than sit on the lens or housing. If a lens is repeatedly covered with debris, the fixture may need a small adjustment or a better-defined edge around the planting bed.

Control Plant Growth Around Every Light

A beautifully layered landscape changes quickly in South Florida. Palms spread, hedges fill in, groundcover rises, and seasonal color can cover a fixture in a matter of weeks. Lighting maintenance and landscape maintenance should work together.

Keep at least several inches of open space around fixtures where possible. Trim leaves, branches, and flowering plants that block the beam or rest directly against the fixture. This is not only about brightness. Plant contact can trap moisture and heat, interfere with aiming, and create shadows that make a carefully designed lighting plan look uneven.

Avoid cutting plants back simply because they have grown near a light. The better approach depends on the intended effect. An uplight meant to accent a mature palm needs a clean upward path, while a soft light washing through ornamental foliage may benefit from a little controlled overlap. If you are unsure which effect was intentional, take a photo before pruning or ask a lighting professional to review the area at night.

Check Fixture Position and Beam Direction

Ground movement, lawn equipment, pets, children, and landscape crews can all shift a fixture. Small changes matter. A path light that leans a few inches may create glare instead of a soft pool of light. An uplight aimed too high can shine into a bedroom window or create a harsh hot spot on a wall.

During your nighttime walk-through, straighten fixtures and make modest aiming adjustments. Keep the light source concealed from normal viewing angles whenever possible. Good landscape lighting reveals the home, trees, texture, and outdoor spaces. It should not make the fixture itself the center of attention.

Be cautious around pool areas and steps. Do not move fixtures in a way that creates dark gaps where guests walk, or direct light toward water in a way that causes distracting reflections. In these areas, a professional adjustment is often worth it because safety and atmosphere are closely connected.

Inspect Wiring and Connections Carefully

Low-voltage systems use cable that is typically buried shallowly and routed through landscape beds. This flexible installation method is one of the system’s advantages, but wires can become exposed after erosion, digging, edging, irrigation repairs, or new planting projects.

Once or twice a year, look for cable that has surfaced, been nicked, or appears pinched beneath a hardscape edge. Check that fixtures feel secure and that no connectors are loose or sitting in standing water. If you see damaged insulation, corroded connections, repeated flickering, or a section of lights that has gone dark, do not rely on tape as a permanent repair.

A qualified lighting technician can locate the issue, make weather-resistant connections, and confirm that the system is operating properly. Electrical symptoms can have more than one cause. A dim fixture may be a simple connection problem, but it can also reflect voltage drop, an overloaded run, fixture damage, or a transformer setting that needs attention.

Give the Transformer and Timer a Seasonal Check

The transformer is the working center of a low-voltage lighting system. It converts household power to the lower voltage used by your landscape lights, and it may also house the timer, photocell, or smart controls. Keep the area around it clear of leaves, irrigation spray, and stored items so it has proper ventilation and remains easy to service.

Check the schedule when daylight-saving time changes and whenever your household routine shifts. A timer that worked well in June may turn lights on too late in December. If your system uses a photocell, make sure new plant growth, decorations, or stored items are not blocking its view of natural light.

Smart controls offer flexibility, but they still need occasional attention. Confirm that programmed schedules match your preferences and that any app-based controls are connected and responding. A system does not need to run all night to be effective. The right operating window depends on how you use your property, local activity, security preferences, and whether you regularly entertain outdoors.

Replace LED Lamps and Components With Compatible Parts

LED lamps last far longer than traditional halogen lamps, which reduces routine replacement. Still, no lamp or component lasts forever. When one fixture looks different from the others, first clean the lens and check the connection. If it remains dim, discolored, or nonfunctional, replace it with a compatible LED lamp or have the fixture evaluated.

Color temperature and beam spread matter as much as brightness. A mismatched replacement can make one tree look stark white while the rest of the property has a warm, inviting glow. Using the same type of lamp is usually the safest choice, particularly in a professionally designed system where each fixture was selected for a specific effect.

If several lights fail at once, avoid replacing every lamp before the system has been checked. Multiple outages may point to a wiring, transformer, or control issue instead.

Know When a Professional Service Visit Makes Sense

Homeowners can handle simple cleaning, debris removal, plant trimming, and visual checks. Call for service when a circuit repeatedly trips, lights flicker after connections have been checked, a transformer hums or runs unusually hot, wiring has been damaged, or fixture performance has changed across a large section of the property.

A professional maintenance visit is also useful after a major landscape renovation, new pool construction, paver work, hurricane-season cleanup, or the addition of mature plantings. These projects can alter sightlines, bury fixtures, disturb cable runs, and change how light reflects across the property.

Tropical Landscape Lighting can assess both the technical condition and the nighttime appearance of a system, because a repair should restore more than power. It should restore the cohesive outdoor environment that makes your home feel welcoming, usable, and thoughtfully finished after dark.

A well-maintained lighting system quietly earns its place every evening: guests find the front walk with confidence, the pool patio feels ready for another hour outside, and the architecture and landscape continue to look like home long after the sun goes down.

Posted in Uncategorized

Architectural Uplighting for Homes That Feels Designed

Architectural Uplighting for Homes That Feels Designed

A beautiful South Florida home can disappear after sunset if its best details are left in shadow. Architectural uplighting for homes gives those details a purposeful nighttime presence, drawing attention to the textures, lines, entryways, columns, rooflines, and landscaping that make a property feel personal. Done well, it does not make a house look overly bright. It makes the entire exterior feel considered, welcoming, and complete.

For Palm Beach County homeowners, outdoor lighting is not just a finishing touch for occasional entertaining. Patios, pools, gardens, and front entries are used throughout the year. A professionally planned low-voltage LED lighting system can extend the time you enjoy them while supporting safety, curb appeal, and a stronger sense of security.

What Architectural Uplighting Actually Does

Uplighting places a fixture low to the ground and aims light upward across a feature. That feature might be the face of a home, a palm tree, a stone column, a garden wall, or the canopy of a mature oak. The light reveals depth that daylight can flatten and creates contrast between the property and the night around it.

The goal is not to light every surface. In fact, too many fixtures or excessive brightness can make a home look harsh, busy, or washed out. Effective architectural lighting uses selective illumination. It establishes focal points, leaves intentional areas of darkness, and guides the eye from the street to the front entry and through the outdoor living spaces.

A clean stucco facade may benefit from a soft, wide beam that grazes upward along the wall. A coquina, coral stone, or textured masonry surface often looks best with a closer fixture that brings out its natural character. Tall columns may call for narrow beams, while a broad front elevation may need several carefully balanced fixtures rather than one powerful source of light.

Architectural Uplighting for Homes Starts With the Property

There is no universal fixture layout for architectural uplighting for homes. The right plan depends on the home’s proportions, finishes, landscaping, sightlines, and the way the family uses the property after dark.

A Mediterranean-style home with arches and layered rooflines often benefits from warm pools of light at columns, entry details, and specimen palms. On a contemporary property, the lighting may be more restrained, emphasizing crisp wall planes, linear pathways, and a single dramatic tree or water feature. A lush tropical garden can be part of the architectural composition too, softening the transition between the home and its surroundings.

The viewing angle matters as much as the fixture location. A light that looks perfect from the driveway may create glare when viewed from an interior window or a favorite patio chair. Before installation, a thoughtful design considers where guests arrive, where vehicles park, how people walk to the pool or backyard, and which areas homeowners see most often from inside the house.

This is why a fixture-by-fixture approach tends to fall short. Lighting added only where a dark spot appears may solve one problem while creating another. A complete design gives the front, sides, backyard, and major landscape features a shared visual language.

Light Quality Matters More Than Raw Brightness

Homeowners often assume more lumens mean better exterior lighting. In practice, light control is usually more valuable than sheer output. The beam spread, fixture shielding, color temperature, mounting position, and aiming angle all affect how the property feels at night.

Warm white LED light is often the best choice for residential exteriors because it complements natural stone, stucco, wood, and greenery without making the setting feel cold. A warmer tone can feel especially inviting around patios and entries. Certain modern finishes and security-focused areas may call for a slightly crisper appearance, but the color should remain consistent across the system whenever possible.

Glare is another common issue. If you can see the bright source of a fixture from the street, walkway, or seating area, the lighting probably needs adjustment. Professional-grade fixtures can be shielded, recessed into planting beds, or aimed with precision so people see the illuminated architecture and landscaping rather than the lamp itself.

Shadows deserve attention as well. A palm trunk can create dramatic vertical texture, but poorly placed lighting may cast an awkward shadow over a wall or across a front door. During the design process, these details are not minor. They are what separate an attractive nightscape from a collection of visible fixtures.

Pair Uplighting With the Lighting People Need to Use

Architectural lighting creates the mood, but functional lighting makes an outdoor environment easier to enjoy. A front entry should be welcoming and easy to navigate. Walkways need enough illumination to reveal changes in elevation. Steps, gates, pool decks, and transitions between patio areas require special care.

The most natural systems layer these needs together. Uplighting may highlight a front facade and palms, while path lights establish a safe route from the driveway to the door. Downlighting from a tree or structure can add gentle, moonlike coverage to a garden walk. Pool and patio lighting can support gatherings without overpowering the atmosphere.

This layered approach also improves security without turning a residence into a floodlit property. Consistent, controlled lighting around entries, walkways, and vulnerable dark areas can make the home feel more occupied and easier to move through at night. It is generally more comfortable and refined than relying on a few high-output fixtures pointed indiscriminately across the yard.

Why Low-Voltage LED Is a Strong Fit for South Florida Homes

Low-voltage LED systems are well suited to refined residential lighting because they allow flexibility without sacrificing performance. Wiring can be routed carefully through planting areas and around hardscapes, making it easier to place fixtures where the design calls for them. As landscaping matures or outdoor spaces change, the system can often be adjusted or expanded.

LED technology also offers meaningful long-term benefits. It uses far less energy than older halogen systems, produces less heat, and provides long service life. That matters when a property includes numerous trees, architectural accents, pathways, and entertaining areas that need reliable nighttime illumination.

Quality installation remains essential. South Florida heat, heavy rain, irrigation, coastal conditions, and active landscaping can expose weak connections and poorly selected fixtures over time. A properly designed system uses components suited to the environment, protects wiring connections, balances electrical loads, and places transformers where they can be serviced appropriately.

Maintenance should be expected, not feared. Plants grow, mulch shifts, fixtures can be bumped during lawn care, and seasonal storms can change the look of a landscape. Periodic adjustments keep beams aimed correctly and help the lighting continue to complement the property rather than compete with it.

Common Uplighting Mistakes to Avoid

The most frequent mistake is overlighting. When every tree, wall, and roofline is equally bright, the eye has nowhere to rest. The home can lose its depth, and the landscape can appear flat. A few well-chosen focal points usually make a stronger impression than lighting everything in view.

Another mistake is choosing fixtures without considering beam angle. A narrow beam on a wide wall leaves distracting bright streaks. A wide beam on a tall palm may illuminate more sky than canopy. Fixture selection should follow the feature being lit, not simply what happens to be available.

It is also easy to overlook the daytime appearance of the system. Fixtures should sit discreetly within beds, near architectural features, or along hardscape edges. Wiring should be managed carefully so the property looks polished in daylight as well as after dark.

Finally, avoid treating lighting as separate from landscape design. A new hedge, palm, flowering tree, or garden wall can become a valuable nighttime feature. Planning the lighting alongside landscape improvements often creates a more cohesive result and prevents costly revisions later.

A Design That Still Feels Right Years From Now

The best exterior lighting is not a trend-driven display. It is a durable design that fits the home, respects the landscape, and continues to make outdoor spaces enjoyable night after night. It should feel just as appropriate when arriving home late, hosting friends by the pool, or seeing the property from the street.

At Tropical Landscape Lighting, the design process is built around those real moments. With more than 30 years of landscaping and lighting experience, the focus is on selecting the right architectural and landscape features, using dependable low-voltage LED equipment, and creating a balanced nighttime environment that reflects each homeowner’s style.

A useful first step is simple: stand at the curb, the front door, and your favorite outdoor seating area after sunset. Notice what disappears, what feels difficult to navigate, and which details deserve to be seen. Those observations are the beginning of a lighting plan that makes home feel more inviting long after daylight ends.

Posted in Uncategorized

How to Light a Patio for Better Evenings Outside

How to Light a Patio for Better Evenings Outside

A patio can look beautifully finished by day and disappear completely after sunset. Knowing how to light a patio is less about adding the brightest fixtures possible and more about creating the right balance: enough illumination to move safely, enough warmth to relax, and enough visual depth to make the space feel connected to your home and landscape.

For Palm Beach County homeowners, that balance matters year-round. A well-designed patio lighting plan extends dinner, conversation, poolside gatherings, and quiet evenings outdoors without turning the yard into a floodlit space. The goal is a welcoming nighttime environment that feels intentional from every seat, doorway, and view inside the home.

Start With How You Use the Patio

Before choosing fixtures, consider what happens on the patio after dark. A dining patio needs clearer light over the table than a lounge area with deep seating. A patio beside a pool needs safe visual guidance at changes in elevation and near wet surfaces. An outdoor kitchen calls for focused task lighting, while a garden-facing sitting area benefits from softer illumination that draws attention outward.

Also think about where people arrive and where they naturally walk. Patio doors, steps, gates, walkways, and transitions between a covered porch and open pavers all deserve attention. These practical points should guide the design before decorative features are selected.

The best plans also account for the view from indoors. When a patio is dark beyond a brightly lit living room, glass doors often read like a black mirror at night. Gentle light on nearby planting beds, trees, walls, or architectural details gives the eye somewhere to travel and makes the outdoor space feel like an extension of the home.

How to Light a Patio in Layers

A comfortable patio does not rely on one fixture type. Layered lighting gives each area a job and prevents the flat, harsh look that comes from a single overhead light or a row of bright floodlights.

Begin with ambient light

Ambient lighting establishes the overall mood. Under-eave fixtures, discreet downlights from a pergola, softly aimed wash lighting, or low-glare lighting around the perimeter can provide this base layer. The light should be broad enough for guests to feel comfortable but restrained enough to preserve a relaxed evening atmosphere.

For an uncovered patio, lighting from nearby trees, rooflines, or landscape structures can often create a more natural result than placing bright fixtures directly in the paving. Under a covered patio, dimmable downlights can be effective when they are spaced and aimed carefully. They should illuminate the usable area without creating hot spots on tabletops or glare in someone’s line of sight.

Add task lighting where activity happens

Task lighting is brighter and more focused. It belongs where people prepare food, climb steps, unlock doors, or need to see a surface clearly. An outdoor kitchen may need dedicated lighting at counters and grills. A dining area may benefit from a shaded pendant or carefully positioned downlighting, especially if meals and games often continue after sunset.

This layer is about function, not visual drama. Use it selectively. Lighting every square foot at the same level can make a patio feel more like a work area than a place to unwind.

Use accent light to create depth

Accent lighting is where the patio begins to feel personal. Uplighting can reveal the trunk and canopy of a mature palm, highlight a specimen tree, or bring texture to a garden wall. A soft wash across stone, stucco, or a privacy hedge adds dimension without demanding attention.

Choose a few features that deserve emphasis rather than lighting every plant. The darker spaces between illuminated areas are part of the design. They create contrast, help prevent visual clutter, and make the fixtures you do use feel more purposeful.

Light the Edges, Steps, and Connections

Patios often become unsafe not because the seating area is too dark, but because the edges are hard to read. A subtle change in paver height, one step down to the pool deck, or a narrow path toward the side yard can be easy to miss after sunset.

Low-voltage LED path lights, step lights, and downlighting can define these transitions without producing glare. The fixture should direct light toward the walking surface rather than into a guest’s eyes. On steps, a soft, even spread is generally more useful than a single intense fixture that leaves dark corners.

Pay special attention to seating walls, planters, and the perimeter closest to the pool. These features can visually blend into the darkness, particularly when guests are moving between a bright indoor space and the patio. Thoughtful edge lighting improves comfort and safety while helping the layout make sense at night.

Choose Warm, Glare-Controlled LED Fixtures

Fixture quality and light color have a major effect on the finished look. For most residential patios, warm white LED lighting creates a more inviting atmosphere than cool blue-white light. It complements natural stone, pavers, wood ceilings, tropical planting, and warm exterior finishes common throughout South Florida.

Glare control is equally important. A fixture can be technically bright enough but still make a space unpleasant if its light source is visible from a chair, dining table, or pool lounger. Well-designed fixtures use shields, lenses, louvers, and careful aiming to place light where it is needed while keeping the source discreet.

Low-voltage LED systems are particularly well suited to patio and landscape lighting. They use less energy than older lighting technologies, offer flexibility in fixture placement, and avoid the frequent lamp replacement associated with many traditional systems. Quality LEDs also provide reliable, consistent illumination when they are installed with properly sized wiring, connections, transformers, and controls.

Plan for South Florida Weather and Landscaping

A patio lighting plan in South Florida needs to look good beyond the first season. Heat, humidity, irrigation, salty air in coastal areas, heavy rain, and fast-growing landscaping all affect fixture performance and placement.

Use exterior-rated materials suited for local conditions, and avoid positioning fixtures where sprinkler spray constantly hits the lens. Plants that look small at installation can block light within a year, so allow room for mature growth and make fixtures accessible for adjustment. Trees, palms, and dense hedges can also change the way light filters across the patio as they grow.

Controls deserve planning as well. A timer, photocell, dimmer, or smart control can make the system easy to enjoy without having to remember a switch every evening. Separating patio, pathway, pool, and landscape zones gives you more flexibility. You may want a brighter setting for entertaining and a quieter, lower level for an ordinary night at home.

Avoid the Most Common Patio Lighting Mistakes

The most common mistake is overlighting. Bright floodlights mounted high on the house may seem like an easy solution, but they can flatten the architecture, wash out landscaping, create glare, and disturb neighbors. More light is not automatically better light.

Another problem is treating lighting as an afterthought. String lights may add charm for a special occasion, but they rarely provide enough safe, durable, well-directed illumination for a finished outdoor living area. They can be part of the atmosphere, especially under a pergola, but they work best alongside a planned lighting system.

Finally, avoid placing fixtures in perfect symmetry simply because it feels orderly during the day. At night, the better question is where light needs to fall and what deserves visual emphasis. A balanced design can be asymmetrical if it responds to the patio’s architecture, planting, circulation, and views.

When Professional Design Makes the Difference

A patio lighting system involves more than selecting attractive fixtures. Voltage drop, wire routing, beam spread, mounting height, fixture finish, drainage, aiming, and future maintenance all influence the result. The choices become even more important when the patio connects to a pool, garden, outdoor kitchen, or large estate landscape.

A professional designer can build the lighting around your home rather than forcing a standard layout onto it. At Tropical Landscape Lighting, that means considering how your patio looks from inside the home, how your family entertains, which landscape features should stand out, and how to create a cohesive nighttime setting that remains practical for everyday use.

The best patio lighting should not announce itself with glare or clutter. It should make guests feel comfortable finding their way, make the architecture and landscaping look considered after dark, and give you one more reason to step outside when the day cools down.

Posted in Uncategorized